×

使用Arduino IDE的ESP8266温度湿度监控网络应用程序

消耗积分:2 | 格式:zip | 大小:0.03 MB | 2022-12-22

时见栖鸦

分享资料个

描述


poYBAGOjtqCAfPm1AAHHB9JmxDM909.jpg
 
1 / 3ESP8266 天气监测
 

上周我收到了一个 ESP8266(adafruit)。新的 ESP8266 具有 arduino 引导加载程序,因此可以将 arduino 代码直接编程到 ESP8266 中。这个 ESP8266 带有 UART、I2C 和 GPIO。有了这个新的 wifi 模块,你不需要任何 arduino 板,你可以直接用它做任何事情。该模块上没有任何 USB 端口,因此有两种方法可以解决此问题。您可以购买 USB 转串口电缆,也可以自己制作带有 USB 转串口转换器的适配器,然后将 ESP8266 直接插入其中。我的 ESP8266 程序r smiler 可以在这里找到。
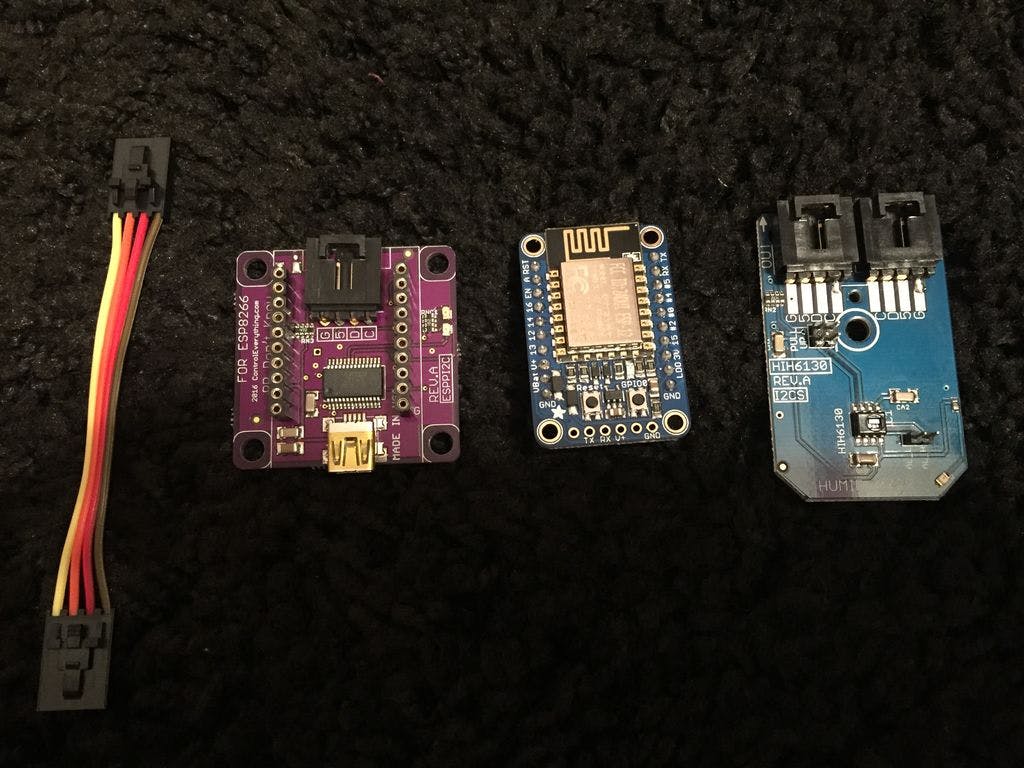
第 1 步:硬件


pYYBAGOjtquAcmMYAAGcd_WMcO8305.jpg
 
1 / 3ESP8266 温度湿度
 

您将需要以下硬件

1.ESP8266 _

2.温湿度传感器HIH6130

3. ESP8266 USB编程器

4.连接电缆

第 2 步:接线和原理图


poYBAGOjtq2ATqwjAABp4HMK2Cg340.jpg
 
1 / 4ESP8266 I2C 引出线
 

在这个项目中,我使用的是即插即用硬件,所以您只需将 I2C 电缆插入传感器和 ESP8266 适配器即可。

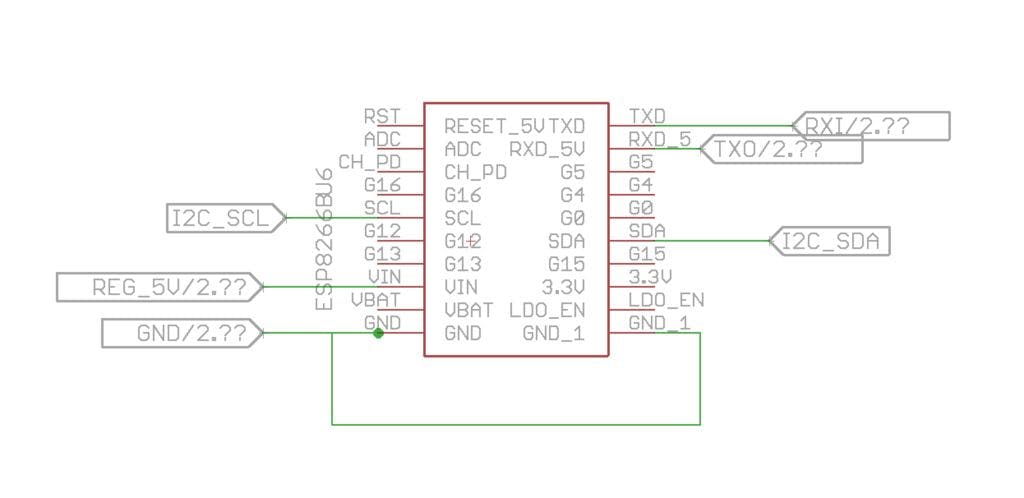
对于 I2C,我使用的是引脚 2,14。

第 3 步:硬件设置


pYYBAGOjtrmAVh1HAAGpWW38B9M532.jpg
 
1 / 3ESP8266 编程扩展板
 

使用 USB 编程器非常容易对 ESP8266 进行编程。要连接传感器,您只需将传感器插入 I2C 适配器即可。我更喜欢使用这些适配器,因为它们很容易连接硬件,没有这些即插即用适配器,连接错误的风险很大。接线不良会损坏您的 wifi 和传感器。

HIH6130是霍尼韦尔的相对湿度和温度传感器。

精度 ±4.0% 相对湿度

温度补偿

Honeywell HumidIcon 数字湿度/温度传感器是组合在同一封装中的数字输出型相对湿度和温度传感器。这些传感器提供 ±4% RH 的精度水平。具有行业领先的长期稳定性、真正的温度补偿数字 I2C、行业领先的可靠性、能效以及超小封装尺寸和选项。其他可用精度:±1.7% RH(HIH9000 系列)、±2.0% RH(HIH8000 系列)、±3.0% RH(HIH7000 系列)和±4.0% RH(HIH6100 系列)。

第 4 步:软件设置


pYYBAGOjtr-AXzvnAAB7iZbu3is624.jpg
 
1 / 2ESP8266 arduino ide
 

这个 ESP8266 可以使用 arduino ide 编程。

确保安装 ESP8266 库。要安装库,请按照这些说明进行操作。

安装库后,选择 ESP8266 板并选择端口并上传代码。

第 5 步:代码


poYBAGOjtsmAcZ2NAAFlMda8o5Y386.jpg
 
1 / 2esp8266 arduino 网络应用程序
 

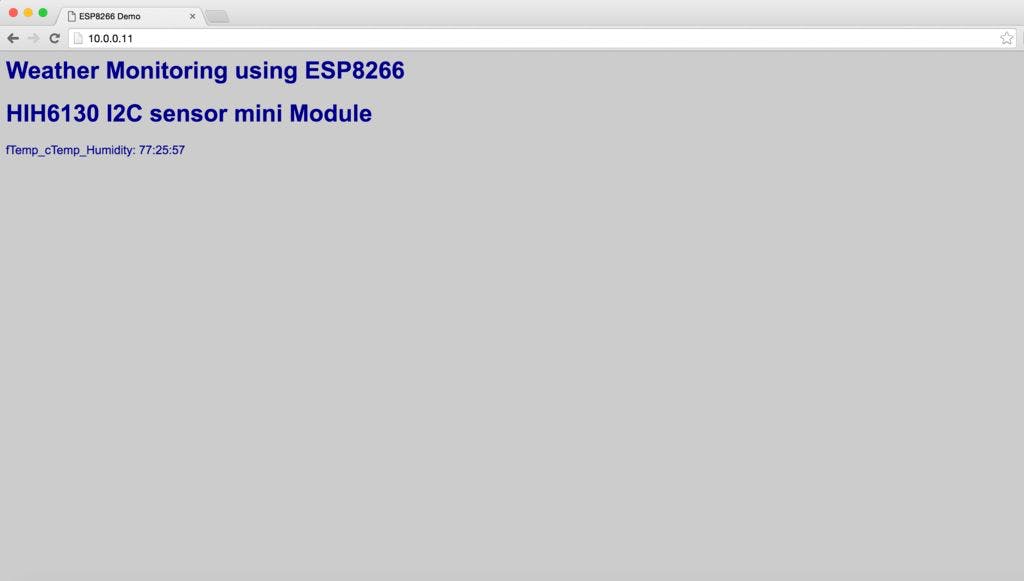
为了在网页上显示传感器 o/p,我编写了一个非常基本的脚本,它将读取传感器数据并显示在浏览器中。

ESP8266 网络应用程序代码示例

#include 
#include
#include 
#include
#include 
// HIH6130 I2C address is 0x27(39)
#define Addr 0x27
const char* ssid     = "NETGEAR34";
const char* password = "sillyviolet195";
ESP8266WebServer server ( 80 );
////////////////////////////////////////////////////////////////
void handleRoot() {
 char temp[400];
 unsigned int data[4];
  Wire.beginTransmission(Addr);
 // Select data register
 Wire.write(0x00);
 // Stop I2C Transmission
 Wire.endTransmission();  // Request 4 bytes of data
 Wire.requestFrom(Addr, 4);  // Read 4 bytes of data
 // humidity msb, humidity lsb, temp msb, temp lsb
 if (Wire.available() == 4)
 {
   data[0] = Wire.read();
   data[1] = Wire.read();
   data[2] = Wire.read();
   data[3] = Wire.read();
 }  // Convert the data to 14-bits
 int humidity = ((((data[0] & 0x3F) * 256) + data[1]) * 100.0) / 16383.0;
 int temp1 = ((data[2] * 256) + (data[3] & 0xFC)) / 4;
 int cTemp = (temp1 / 16384.0) * 165.0 - 40.0;
 int fTemp = cTemp * 1.8 + 32;  // Output data to serial monitor
 Serial.print("Relative Humidity :");
 Serial.print(humidity);
 Serial.println(" %RH");
 Serial.print("Temperature in Celsius :");
 Serial.print(cTemp);
 Serial.println(" C");
 Serial.print("Temperature in Fahrenheit :");
 Serial.print(fTemp);
 Serial.println(" F");
 delay(500); snprintf ( temp, 400,"
\
 
\
   
\
   
\
   
\
 \
 
\
   
Weather Monitoring using ESP8266\
   
HIH6130 I2C sensor mini Module\
   
fTemp_cTemp_Humidity: %02d:%02d:%02d\
   \
",    fTemp, cTemp, humidity
 );
 
 server.send ( 200, "text/html", temp );
 }
/////////////////////////////////////////////////////////////////
void handleNotFound() {
 String message = "File Not Found\n\n";
 message += "URI: ";
 message += server.uri();
 message += "\nMethod: ";
 message += ( server.method() == HTTP_GET ) ? "GET" : "POST";
 message += "\nArguments: ";
 message += server.args();
 message += "\n";  for ( uint8_t i = 0; i < server.args(); i++ ) {
   message += " " + server.argName ( i ) + ": " + server.arg ( i ) + "\n";
 }  server.send ( 404, "text/plain", message );
}void setup ( void ) {
 Wire.begin(2,14);
 Serial.begin ( 115200 );
 WiFi.begin ( ssid, password );
 Serial.println ( "" );  // Wait for connection
 while ( WiFi.status() != WL_CONNECTED ) {
   delay ( 500 );
   Serial.print ( "." );
 }  Serial.println ( "" );
 Serial.print ( "Connected to " );
 Serial.println ( ssid );
 Serial.print ( "IP address: " );
 Serial.println ( WiFi.localIP() );  if ( MDNS.begin ( "esp8266" ) ) {
   Serial.println ( "MDNS responder started" );
 }  server.on ( "/", handleRoot ); 
 server.onNotFound ( handleNotFound );
 server.begin();
 Serial.println ( "HTTP server started" );
}void loop ( void ) {
 server.handleClient();
}

第 6 步:ESP8266 网络应用


pYYBAGOjts2AP607AAA7toQYm0w046.jpg
 
1 / 4ESP8266 网络应用
 

我没有太多 exp 与 html。所以我只是写了一个简单的示例应用程序,说明如何将传感器数据从 ESP8266 显示到网页。

此代码将使用传感器 HIH6130 读取温度和湿度,并将数据显示在本地网页上。

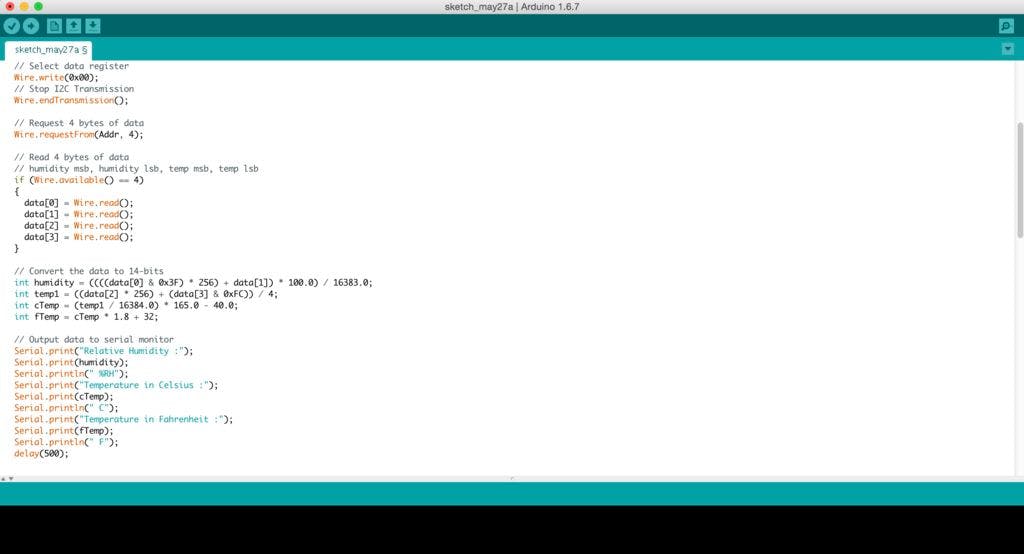
读取传感器数据真的很容易。请检查此代码以读取温度和湿度。

第 7 步:传感器输出

 
poYBAGOjttKAAwGHAAC9PKDqo7c632.jpg
ESP8266 HTML
 

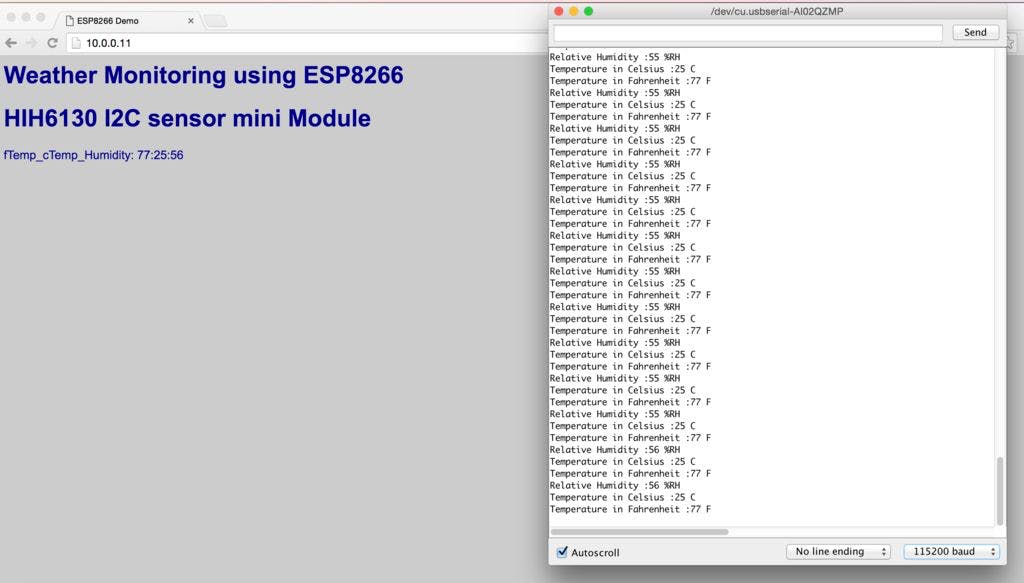
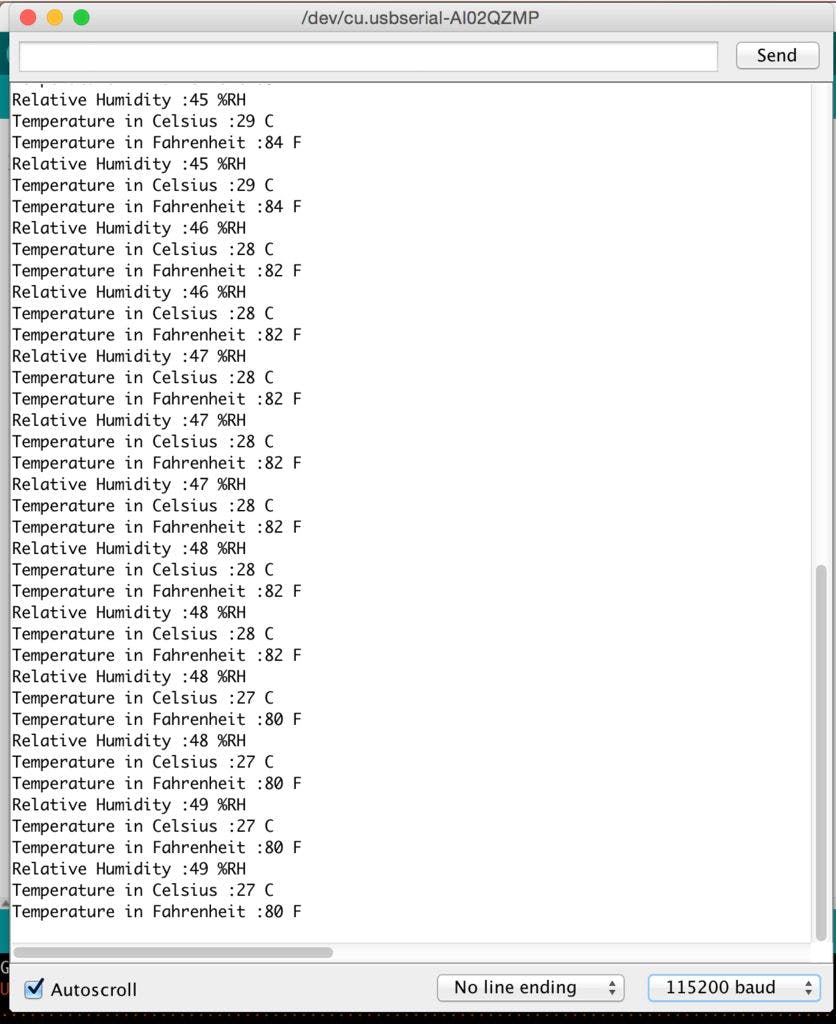
我在 arduino 串行监视器以及本地网页上显示了传感器数据。

如您所见,它们显示相同的输出。

如果您有任何问题,请告诉我。


声明:本文内容及配图由入驻作者撰写或者入驻合作网站授权转载。文章观点仅代表作者本人,不代表电子发烧友网立场。文章及其配图仅供工程师学习之用,如有内容侵权或者其他违规问题,请联系本站处理。 举报投诉

评论(0)
发评论

下载排行榜

全部0条评论

快来发表一下你的评论吧 !

'+ '

'+ '

'+ ''+ '
'+ ''+ ''+ '
'+ ''+ '' ); $.get('/article/vipdownload/aid/'+webid,function(data){ if(data.code ==5){ $(pop_this).attr('href',"/login/index.html"); return false } if(data.code == 2){ //跳转到VIP升级页面 window.location.href="//m.jibsdb.com/vip/index?aid=" + webid return false } //是会员 if (data.code > 0) { $('body').append(htmlSetNormalDownload); var getWidth=$("#poplayer").width(); $("#poplayer").css("margin-left","-"+getWidth/2+"px"); $('#tips').html(data.msg) $('.download_confirm').click(function(){ $('#dialog').remove(); }) } else { var down_url = $('#vipdownload').attr('data-url'); isBindAnalysisForm(pop_this, down_url, 1) } }); }); //是否开通VIP $.get('/article/vipdownload/aid/'+webid,function(data){ if(data.code == 2 || data.code ==5){ //跳转到VIP升级页面 $('#vipdownload>span').text("开通VIP 免费下载") return false }else{ // 待续费 if(data.code == 3) { vipExpiredInfo.ifVipExpired = true vipExpiredInfo.vipExpiredDate = data.data.endoftime } $('#vipdownload .icon-vip-tips').remove() $('#vipdownload>span').text("VIP免积分下载") } }); }).on("click",".download_cancel",function(){ $('#dialog').remove(); }) var setWeixinShare={};//定义默认的微信分享信息,页面如果要自定义分享,直接更改此变量即可 if(window.navigator.userAgent.toLowerCase().match(/MicroMessenger/i) == 'micromessenger'){ var d={ title:'使用Arduino IDE的ESP8266温度湿度监控网络应用程序',//标题 desc:$('[name=description]').attr("content"), //描述 imgUrl:'https://'+location.host+'/static/images/ele-logo.png',// 分享图标,默认是logo link:'',//链接 type:'',// 分享类型,music、video或link,不填默认为link dataUrl:'',//如果type是music或video,则要提供数据链接,默认为空 success:'', // 用户确认分享后执行的回调函数 cancel:''// 用户取消分享后执行的回调函数 } setWeixinShare=$.extend(d,setWeixinShare); $.ajax({ url:"https://www.elecfans.com/app/wechat/index.php?s=Home/ShareConfig/index", data:"share_url="+encodeURIComponent(location.href)+"&format=jsonp&domain=m", type:'get', dataType:'jsonp', success:function(res){ if(res.status!="successed"){ return false; } $.getScript('https://res.wx.qq.com/open/js/jweixin-1.0.0.js',function(result,status){ if(status!="success"){ return false; } var getWxCfg=res.data; wx.config({ //debug: true, // 开启调试模式,调用的所有api的返回值会在客户端alert出来,若要查看传入的参数,可以在pc端打开,参数信息会通过log打出,仅在pc端时才会打印。 appId:getWxCfg.appId, // 必填,公众号的唯一标识 timestamp:getWxCfg.timestamp, // 必填,生成签名的时间戳 nonceStr:getWxCfg.nonceStr, // 必填,生成签名的随机串 signature:getWxCfg.signature,// 必填,签名,见附录1 jsApiList:['onMenuShareTimeline','onMenuShareAppMessage','onMenuShareQQ','onMenuShareWeibo','onMenuShareQZone'] // 必填,需要使用的JS接口列表,所有JS接口列表见附录2 }); wx.ready(function(){ //获取“分享到朋友圈”按钮点击状态及自定义分享内容接口 wx.onMenuShareTimeline({ title: setWeixinShare.title, // 分享标题 link: setWeixinShare.link, // 分享链接 imgUrl: setWeixinShare.imgUrl, // 分享图标 success: function () { setWeixinShare.success; // 用户确认分享后执行的回调函数 }, cancel: function () { setWeixinShare.cancel; // 用户取消分享后执行的回调函数 } }); //获取“分享给朋友”按钮点击状态及自定义分享内容接口 wx.onMenuShareAppMessage({ title: setWeixinShare.title, // 分享标题 desc: setWeixinShare.desc, // 分享描述 link: setWeixinShare.link, // 分享链接 imgUrl: setWeixinShare.imgUrl, // 分享图标 type: setWeixinShare.type, // 分享类型,music、video或link,不填默认为link dataUrl: setWeixinShare.dataUrl, // 如果type是music或video,则要提供数据链接,默认为空 success: function () { setWeixinShare.success; // 用户确认分享后执行的回调函数 }, cancel: function () { setWeixinShare.cancel; // 用户取消分享后执行的回调函数 } }); //获取“分享到QQ”按钮点击状态及自定义分享内容接口 wx.onMenuShareQQ({ title: setWeixinShare.title, // 分享标题 desc: setWeixinShare.desc, // 分享描述 link: setWeixinShare.link, // 分享链接 imgUrl: setWeixinShare.imgUrl, // 分享图标 success: function () { setWeixinShare.success; // 用户确认分享后执行的回调函数 }, cancel: function () { setWeixinShare.cancel; // 用户取消分享后执行的回调函数 } }); //获取“分享到腾讯微博”按钮点击状态及自定义分享内容接口 wx.onMenuShareWeibo({ title: setWeixinShare.title, // 分享标题 desc: setWeixinShare.desc, // 分享描述 link: setWeixinShare.link, // 分享链接 imgUrl: setWeixinShare.imgUrl, // 分享图标 success: function () { setWeixinShare.success; // 用户确认分享后执行的回调函数 }, cancel: function () { setWeixinShare.cancel; // 用户取消分享后执行的回调函数 } }); //获取“分享到QQ空间”按钮点击状态及自定义分享内容接口 wx.onMenuShareQZone({ title: setWeixinShare.title, // 分享标题 desc: setWeixinShare.desc, // 分享描述 link: setWeixinShare.link, // 分享链接 imgUrl: setWeixinShare.imgUrl, // 分享图标 success: function () { setWeixinShare.success; // 用户确认分享后执行的回调函数 }, cancel: function () { setWeixinShare.cancel; // 用户取消分享后执行的回调函数 } }); }); }); } }); } function openX_ad(posterid, htmlid, width, height) { if ($(htmlid).length > 0) { var randomnumber = Math.random(); var now_url = encodeURIComponent(window.location.href); var ga = document.createElement('iframe'); ga.src = 'https://www1.elecfans.com/www/delivery/myafr.php?target=_blank&cb=' + randomnumber + '&zoneid=' + posterid+'&prefer='+now_url; ga.width = width; ga.height = height; ga.frameBorder = 0; ga.scrolling = 'no'; var s = $(htmlid).append(ga); } } openX_ad(828, '#berry-300', 300, 250);